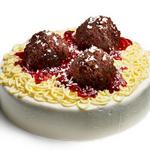
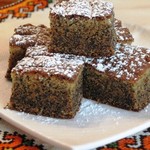
Piñata Cake
Votes: 2


Time: 2 hours 20 minutes
Complexity: easily
Servings: 12
Complexity: easily
Servings: 12
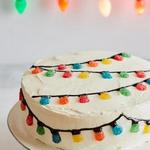
If you're throwing a Mexican-themed party, the centerpiece should be this vibrant piñata cake, a staple of Mexican celebrations. For easy preparation, use store-bought chocolate cake mix and store-bought frosting. Follow the step-by-step instructions to assemble a beautiful piñata, just like the real thing, and decorate it with rainbow coconut flakes. Bright gel food coloring works best for coloring it.
The recipes use measuring containers with the following volumes:
1 glass (st.) - 250 ml.
3/4 cup (st.) - 180 ml.
2/3 cup (st.) - 160 ml.
1/2 cup (st.) - 125 ml.
1/3 cup (st.) - 80 ml.
1/4 cup (st.) - 60 ml.
1 tablespoon (tbsp) - 15 ml.
1 teaspoon (tsp) - 5 ml.
1/5 teaspoon (tsp) - 1 ml.
1 glass (st.) - 250 ml.
3/4 cup (st.) - 180 ml.
2/3 cup (st.) - 160 ml.
1/2 cup (st.) - 125 ml.
1/3 cup (st.) - 80 ml.
1/4 cup (st.) - 60 ml.
1 tablespoon (tbsp) - 15 ml.
1 teaspoon (tsp) - 5 ml.
1/5 teaspoon (tsp) - 1 ml.
Ingredients for the recipe:
- 2 packages of 450-480 g chocolate sponge cake mix (+ any additional ingredients needed)
- 7 ice cream cones
- 2 tubes of vanilla glaze (450g each)
- 3 bags of 200g sweet coconut flakes
- Gel or neon food coloring (purple, yellow, blue, orange, and pink)
- Black icing, for decoration
We recommend


Recipes with similar ingredients: cake mix, wafer rolls, cream, dye, coconut flakes
Cooking the dish according to the recipe:
- Preheat oven to 325°F (160°C). Spray two 9x5-inch loaf pans with cooking spray; line with parchment paper, leaving an overhang around the edges. Mix the chocolate cake batter according to the package directions. Fill the pans about two-thirds full with batter (you'll have some extra batter).
- Bake the cakes for 45 minutes, then remove one from the oven and insert an ice cream cone, 1 cm deep, with the top cream layer, 4 cm from the edge of the cake. Continue baking both cakes for another 10-15 minutes. Let cool, then remove from the pans.
- Using a serrated knife, trim the cone off the top of the sponge cake and place it cut-side down on a work surface. Using icing, attach 4 ice cream cones to the 4 corners of the sponge cake to create the feet. Freeze.
- Trim the bottoms of the two remaining horns with a serrated knife to create pointed ears.
- Cut the baked cone cake in half to form the head (you won't need the other half). Place it cut-side down. Use icing to attach the ears to the top of the head; place in the freezer to set.
- Divide the coconut flakes into 5 pieces and place them in zip-lock bags. Add a few drops of food coloring to each bag, then shake and massage to combine. Add more food coloring if needed for vibrant colors.
- Remove the foot cake from the freezer. Frost the cones and press purple coconut onto them. Frost the bottom of the body and decorate with yellow coconut.
- Turn the cake over so it stands on its feet. Frost the rest of the body and decorate with blue chips on the sides and orange chips on top, leaving a bare square for the head. Return the cake to the freezer.
- Frost the head, ears, and nose; decorate with stripes of purple, blue, pink, and yellow coconut flakes. Attach the head to the body. Use the remaining white and black frosting to create the eyes and nostrils.


Categories:
Recipe collections


Similar recipes