Pencil Cake
Votes: 1


Time: 1 hour 20 min.
Complexity: average
Servings: 10 - 12
Complexity: average
Servings: 10 - 12
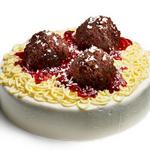
Celebrate the start of the school year or Teacher's Day with this charming pencil-shaped cake. You can bring it to school or celebrate a first-grader with family—either way, it's a surefire surprise. Follow the step-by-step recipe, and your pencil cake will turn out incredibly realistic. Its base is pound cake. It's dense and easy to cut into edges. A slice of pound cake, decorated with pink icing and green gummy ribbons, becomes an eraser. And the sharpened tip of the "pencil" is a chocolate cone. This delicious start to the school year will be long remembered!
The recipes use measuring containers with the following volumes:
1 glass (st.) - 250 ml.
3/4 cup (st.) - 180 ml.
2/3 cup (st.) - 160 ml.
1/2 cup (st.) - 125 ml.
1/3 cup (st.) - 80 ml.
1/4 cup (st.) - 60 ml.
1 tablespoon (tbsp) - 15 ml.
1 teaspoon (tsp) - 5 ml.
1/5 teaspoon (tsp) - 1 ml.
1 glass (st.) - 250 ml.
3/4 cup (st.) - 180 ml.
2/3 cup (st.) - 160 ml.
1/2 cup (st.) - 125 ml.
1/3 cup (st.) - 80 ml.
1/4 cup (st.) - 60 ml.
1 tablespoon (tbsp) - 15 ml.
1 teaspoon (tsp) - 5 ml.
1/5 teaspoon (tsp) - 1 ml.
Ingredients for the recipe:
- 2 frozen pound cakes, 450g each. (recipe), defrost
- 1 package (450 g) of vanilla glaze
- 6 drops of red food coloring
- 23 drops of yellow food coloring
- 2 tablespoons semi-sweet chocolate chips
- 2 green gummy strips
We recommend


Recipes with similar ingredients: cupcake, cream, chocolate chips (granules), marmalade
Cooking the dish according to the recipe:
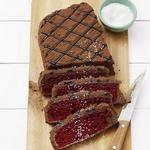
- Cut a 5cm-thick slice from one cupcake—this will be the eraser. Cut a 1cm-thick slice from the uncut ends of both cupcakes. Place the two cupcakes cut-side down to form one long cupcake.
- Using a small knife, draw two lines down the length of both cupcakes, 3 cm from each edge. Following these lines, trim the edges of the cupcakes at an angle, as shown in the picture.
- In a glass liquid measuring cup, mix 0.5 tbsp. vanilla glaze, red food coloring, and 3 drops of yellow food coloring. Microwave for about 20 seconds, stirring every 5 seconds.
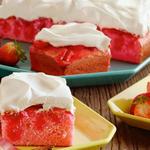
- Make an eraser.
Place a 2-inch-thick slice of cake on a wire rack set over a baking sheet. Spread the warm pink icing evenly over the cake. Refrigerate until the icing sets, about 20 minutes. - Microwave the chocolate chips in an unsealed, resealable plastic bag in 5-second intervals until melted. Push the chocolate to one corner, twist the bag, and secure with tape; freeze until completely set.
- Mix the remaining 1.5 cups of frosting with 20 drops of yellow food coloring. Use an offset spatula to spread the frosting along the beveled edges of the cake.
- Make a pencil tip.
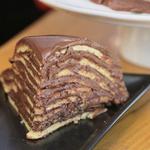
Use a small knife to cut off one end of the cake to create the tip of a sharpened pencil. - Remove the chocolate cone from the bag and trim the base to make it flat. Use icing to attach the chocolate tip to the pencil.
- Make an eraser.
Attach the eraser to the other end of the pencil. Place the gummy bear strips on and around the joint between the pencil and the eraser, trimming any excess as needed. Gently press into the icing to secure.


Categories:
Similar recipes