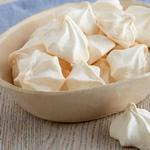
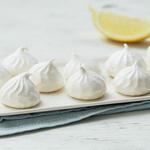
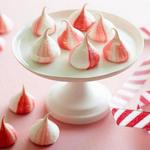
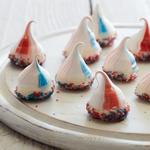
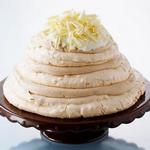
Meringues "Geodes"
Votes: 1


Time: 1 hour plus setting time
Complexity: easily
Quantity: 12 cakes
Complexity: easily
Quantity: 12 cakes
Nutritional value per serving:
Calories 137, total fat 5 G., saturated fats 2 G., proteins 2 G., carbohydrates 24 G., fiber 1 G., cholesterol 0 mg, sodium 41 mg, sugar 17 G.
Calories 137, total fat 5 G., saturated fats 2 G., proteins 2 G., carbohydrates 24 G., fiber 1 G., cholesterol 0 mg, sodium 41 mg, sugar 17 G.
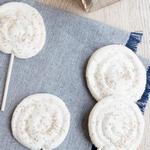
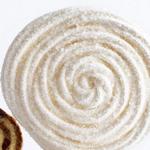
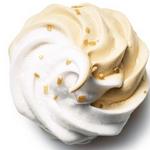
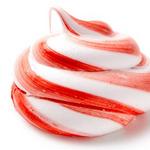
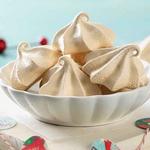
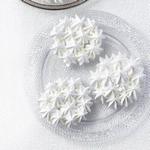
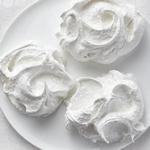
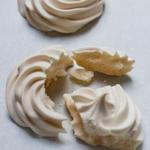
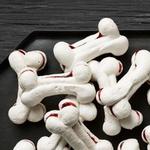
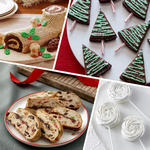
Like natural geodes, these wonderful meringues captivate with their mysterious appearance and beauty, appearing very realistic. To decorate them, you'll need colored sugar crystals on sticks, which you can grow yourself or buy at a candy store. To make the meringues look like real geodes, hollow out their centers and fill them with colored crystals while they're still warm and soft inside. A light dusting of cocoa powder will give them a stone-like appearance on the outside. These meringues make excellent gifts for friends and family.
The recipes use measuring containers with the following volumes:
1 glass (st.) - 250 ml.
3/4 cup (st.) - 180 ml.
2/3 cup (st.) - 160 ml.
1/2 cup (st.) - 125 ml.
1/3 cup (st.) - 80 ml.
1/4 cup (st.) - 60 ml.
1 tablespoon (tbsp) - 15 ml.
1 teaspoon (tsp) - 5 ml.
1/5 teaspoon (tsp) - 1 ml.
1 glass (st.) - 250 ml.
3/4 cup (st.) - 180 ml.
2/3 cup (st.) - 160 ml.
1/2 cup (st.) - 125 ml.
1/3 cup (st.) - 80 ml.
1/4 cup (st.) - 60 ml.
1 tablespoon (tbsp) - 15 ml.
1 teaspoon (tsp) - 5 ml.
1/5 teaspoon (tsp) - 1 ml.
Ingredients for the recipe:
- Whites of 3 large eggs, room temperature
- 1/4 tsp cream of tartar
- 3/4 cup granulated sugar
- Black gel food coloring for tinting
- 1 tsp vanilla extract or other flavoring of your choice (optional)
- Cocoa powder for dusting
- 10 sticks with sugar crystals in different colors, for decoration
- 2 cups white melting candies
- Special equipment: a 3-tablespoon cookie scoop (No. 20), a metal teaspoon, and a pastry brush
We recommend


Recipes with similar ingredients: eggs, meringue, cream of tartar, chocolate chips (granules), cocoa
Cooking the dish according to the recipe:
- Preheat oven to 120°C.
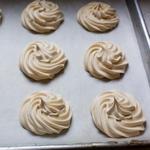
- Place the egg whites in the bowl of a stand mixer and beat with the whisk attachment on medium speed until foamy. Add the cream of tartar and increase the speed to medium-high. Beat in the granulated sugar, 1 tablespoon at a time, adding a couple of drops of black food coloring with the last tablespoon to tint the mixture light gray. Beat in the vanilla extract, if using.
- Continue beating until stiff, glossy peaks form, another 6 minutes.
- Spray a cookie scoop with cooking spray, scoop the meringue into balls, and place them on the prepared baking sheet, spacing them 2.5 cm (1 inch) apart. Lightly dust the tops with cocoa powder (the meringue should be visible underneath).
- Bake the meringues until set, about 1 hour. Remove the baking sheet from the oven, turn off the oven, and close the door. Let the meringues stand until cool enough to handle, about 5 minutes.
- Then make holes in them: hold the meringue in your hand, flat side up. Using the edge of a metal teaspoon, carefully cut a hole in the center of the base, leaving a slight overhang around the hole. Press your thumb into the hole and press the inside of the meringue against the sides to create a hollow (see Note).
- Return the meringues to the baking sheet and place them in the turned-off oven until completely dry, at least 3 hours and up to 8 hours.
- Use a wooden spoon to break the crystals from the candy canes into smaller pieces, removing them from the sticks. Place the crystals in small bowls, separating them by color.
- Place white candy melts in a microwave-safe bowl and microwave in 30-second intervals, stirring, until melted.
- Using a pastry brush, draw a circle of melted icing on the bottom of the meringue cavity. Immediately fill the cavity with dark crystals. Wait a few seconds, then pour the excess candy back into the bowl.
- Frost the rest of the cavity with icing. Immediately fill the cavity with light crystals. Wait a few seconds and then pour out any excess. Repeat with the remaining meringues, icing, and candy canes.
Note
If the meringue breaks, simply glue it back together with white chocolate. Save the meringue crumbs for topping ice cream, lattes, and hot chocolate.
Categories:
Similar recipes