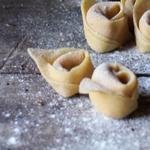
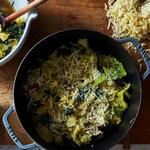
Jamie Oliver's Homemade Pasta
Votes: 4


Time: 1 hour.
Complexity: easily
Servings: 6
Complexity: easily
Servings: 6
Nutritional value per serving:
Calories 426, total fat 7.5 G., saturated fats G., proteins 17 G., carbohydrates 71 G., fiber G., cholesterol mg, sodium mg, sugar G.
Calories 426, total fat 7.5 G., saturated fats G., proteins 17 G., carbohydrates 71 G., fiber G., cholesterol mg, sodium mg, sugar G.
All it takes to make perfect pasta dough is simple ingredients and a little love.
The recipes use measuring containers with the following volumes:
1 glass (st.) - 250 ml.
3/4 cup (st.) - 180 ml.
2/3 cup (st.) - 160 ml.
1/2 cup (st.) - 125 ml.
1/3 cup (st.) - 80 ml.
1/4 cup (st.) - 60 ml.
1 tablespoon (tbsp) - 15 ml.
1 teaspoon (tsp) - 5 ml.
1/5 teaspoon (tsp) - 1 ml.
1 glass (st.) - 250 ml.
3/4 cup (st.) - 180 ml.
2/3 cup (st.) - 160 ml.
1/2 cup (st.) - 125 ml.
1/3 cup (st.) - 80 ml.
1/4 cup (st.) - 60 ml.
1 tablespoon (tbsp) - 15 ml.
1 teaspoon (tsp) - 5 ml.
1/5 teaspoon (tsp) - 1 ml.
Ingredients for the recipe:
- 6 large eggs
- 600 g Italian wheat flour type "00"
We recommend


Recipes with similar ingredients: unleavened dough, premium flour, eggs
Cooking the dish according to the recipe:
- Place flour on a work surface. Make a well in the center and crack the eggs into it. Beat the eggs with a fork until smooth. Using your fingertips, fold the eggs into the flour, incorporating them little by little until combined. Bring the dough pieces together—with a little effort, love, and attention, they will form one large, smooth ball of dough!
- You can also make the dough in a food processor. Simply add the ingredients and pulse until the flour resembles breadcrumbs. Then, turn the mixture out onto a work surface and use your hands to form the dough into a ball.
- Once everything is ready, the dough needs to be kneaded and kneaded by hand to form gluten, otherwise the pasta will be soft and crumbly when cooked, rather than elastic (for the al dente state).
There's no secret to kneading the dough. You just need to lightly hit it with your hands, pressing it down onto the table, shaping it, kneading, stretching, and then pressing it down again with the heel of your hand. This is quite a labor-intensive process—after a few minutes, you'll understand why Italian grandmothers have hands like boxers! You'll know when to stop: the dough will feel soft and silky, without the roughness that comes from flour. - Now all you need to do is wrap it in plastic wrap and refrigerate it for at least half an hour before using. Make sure the wrap is tightly sealed, otherwise the dough will dry out and develop a crust (this will create lumps when you roll out the noodles, and no one likes those!).
How to roll out pasta
Firstly, if you don't have a pasta machine, no problem! Every home cook I met while traveling in Italy rolled out their noodles with rolling pins and never even considered buying a machine! The key to rolling is getting the dough thin enough to handle. Rolling out one large lump of dough at once is quite difficult, and you'll need a very long rolling pin. Alternatively, you can roll out many small pieces of dough instead of just a few large ones. Rolling by hand will produce a more rounded shape than the long rectangles produced by a machine. Be smart, and everything will be just fine!- If you're using a pasta machine, it needs to be securely mounted on a clean work surface (choose the longest surface available). Clear away any unnecessary clutter from the table for now—pieces of paper, a teapot, a bread bin, school notebooks, and so on. This will take less than a minute, and a clean surface will make working much easier, trust me.
- Dust the surface with type 00 flour, take a piece of dough the size of a large orange, and flatten it with your fingers. Set the rollers of the machine to the widest setting and roll the dough through them. If it's sticky, lightly dust it with flour.
Turn the control knob to the next thickest setting and run the dough through the machine again. Fold it in half, set the rollers to the widest setting again, and run the dough through the machine again.
Repeat this process five or six times. It may seem like nothing's changing, but you're actually rolling out the dough—by rolling it and rolling it through the rollers a few times, you'll feel the difference. The dough will be silky smooth, meaning you've got excellent pasta! - Now you need to roll out the dough properly, running it through the machine on all settings—from the widest setting to the narrowest. Each time you pass the dough through, lightly dust it with flour on both sides. When you reach the smallest distance between the rollers, fold the dough in half lengthwise three times to create a neat sheet of pasta. This will leave you with a square-shaped piece of dough. Turn it 90 degrees and run it through the machine on the widest setting.
When you roll out the dough for the final time, you should have a nice rectangular sheet of silky dough with smooth edges—just like the pros! If the dough is slightly creased at the edges, fold it in half once, move the rollers a couple of notches wider, and roll the dough again. This should solve the problem. - Whether you're rolling by hand or by machine, it's important to know when to stop. If you're making tagliatelle, lasagna, or straccia, you should roll the dough to the thickness of a playing card or a beer mat. If you're filling the pasta—for example, making ravioli or tortellini—you should roll it slightly thinner, or until you can clearly see your hand or printed text through it.
- Once you've rolled the pasta out to your desired shape, you can immediately shape it or cut it. It dries much faster than you think, so no matter which recipe you choose, don't let it sit for more than 1-2 minutes before cutting. You can place a damp, clean kitchen towel over the dough to prevent it from drying out.
Categories:
Similar recipes