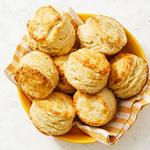
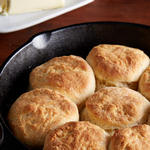
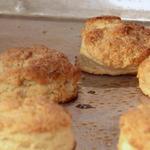
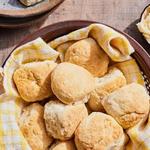
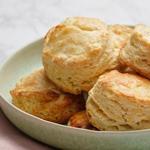
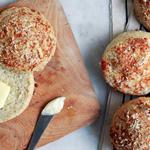
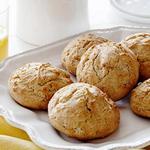
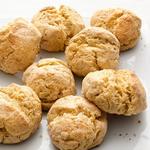
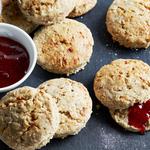
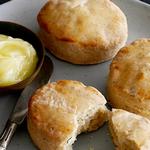
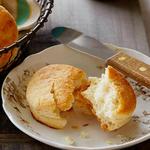
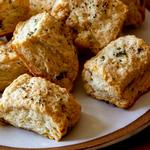
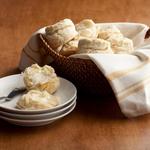
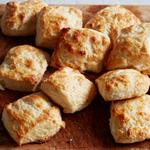
Super-flaky biscuits
Votes: 1


Time: 1 hour 15 minutes
Complexity: easily
Servings: 12
Complexity: easily
Servings: 12
Nutritional value per serving:
Calories 339, total fat 21 G., saturated fats 13 G., proteins 5 G., carbohydrates 33 G., fiber 1 G., cholesterol 55 mg, sodium 277 mg, sugar 3 G.
Calories 339, total fat 21 G., saturated fats 13 G., proteins 5 G., carbohydrates 33 G., fiber 1 G., cholesterol 55 mg, sodium 277 mg, sugar 3 G.
These sour milk buns taste like classic biscuits, but their fluffy, high layers set them apart from the crowd. Several tricks help achieve this texture. First and foremost, use grated frozen butter. It mixes with the flour faster and easier than larger chunks. The butter stays cold longer, which is key to beautiful layers. While many recipes simply knead the dough, cutting and stacking it reduces gluten development, making it easier to work with and improving the consistency of the layers. And one last trick: don't forget to dust the layers with flour, which will make them more distinct.
The recipes use measuring containers with the following volumes:
1 glass (st.) - 250 ml.
3/4 cup (st.) - 180 ml.
2/3 cup (st.) - 160 ml.
1/2 cup (st.) - 125 ml.
1/3 cup (st.) - 80 ml.
1/4 cup (st.) - 60 ml.
1 tablespoon (tbsp) - 15 ml.
1 teaspoon (tsp) - 5 ml.
1/5 teaspoon (tsp) - 1 ml.
1 glass (st.) - 250 ml.
3/4 cup (st.) - 180 ml.
2/3 cup (st.) - 160 ml.
1/2 cup (st.) - 125 ml.
1/3 cup (st.) - 80 ml.
1/4 cup (st.) - 60 ml.
1 tablespoon (tbsp) - 15 ml.
1 teaspoon (tsp) - 5 ml.
1/5 teaspoon (tsp) - 1 ml.
Ingredients for the recipe:
- 3 and 3/4 cups premium flour
- 4.5 tsp baking powder
- 1 tbsp. sugar
- 2.5 tsp coarse salt
- 3/4 tsp baking soda
- 20 tbsp (275 g) frozen unsalted butter, plus melted butter for greasing
- 1.5 cups chilled low-fat sour milk or kefir + extra for greasing
We recommend


Recipes with similar ingredients: premium flour, sour milk, kefir
Cooking the dish according to the recipe:
- Line a baking sheet with parchment paper.
- In a large bowl, combine the flour, baking powder, sugar, salt, and baking soda. Grate the butter coarsely and add it to the flour mixture. Quickly mix the butter into the flour mixture with your hands, distributing and coating it evenly. Slowly pour the soured milk into the flour mixture, mixing with a fork until a rough dough forms. There may be some dry bits; do not overmix.
- Turn the dough out onto a cutting board or work surface (the dough does not need to be floured at this stage).
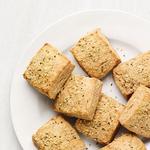
- Roll the dough into a 1 cm thick rectangle, approximately 30 x 20 cm, leveling the edges with a bench scraper or ruler. Using a sharp knife, cut the dough into 6 even pieces and stack them on top of each other, trying to align the edges. If large pieces of dough break off, gently press them back into place, trying to maintain their shape and uniform thickness. Smaller pieces that break off can be tucked between the layers. This will be your first set of layers. The dough may not seem moist enough at this point; this is normal.
- Lightly flour the work surface and the dough. Roll the stack again into a 1 cm thick rectangle, approximately 30 x 20 cm, leveling the sides with a bench scraper or ruler. Lightly flour the surface of the dough again. This will make the layers more visible. It's a good idea to flip the dough after every few rolls to ensure the bottom layers stay in place.
- Cut the dough again into 6 equal pieces and stack them on top of each other to form a second set of layers. Repeat this process again, flouring the work surface as needed, to form a third set of layers, for a total of 18 layers.
- Roll out the dough to a thickness of approximately 4 cm. Cut out 9 circles using a floured 6 cm diameter cookie cutter and place them on the prepared baking sheet. Don't twist the cookie cutter; simply press it into the dough, otherwise the edges will stick together and the layers won't rise properly. Gather the dough scraps, press them down, and cut out 3 more cookies.
- Transfer the remaining cookies to the prepared baking sheet and place the baking sheet in the freezer while the oven preheats and until the cookies are completely set, 10 to 15 minutes.
- Preheat oven to 220°C.
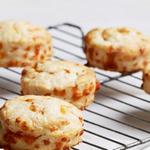
- Brush the top of the dough with sour milk, making sure to leave the sides dry. Bake until golden brown, 15-18 minutes. Brush the warm buns with melted butter, if desired, and serve.
Categories:
Similar recipes